How do I add new points to the bezier curve?
Just double click onto the curve. The new point will be added nearby the clicked position.
How do I remove bezier points?
Click onto the bezier curve point you want to remove. It should be marked as selected.
Then just press the [DELETE] key and the point will be removed.
Note that at least two points are required to define a bezier curve. The last two points cannot be removed!
Note that at least two points are required to define a bezier curve. The last two points cannot be removed!
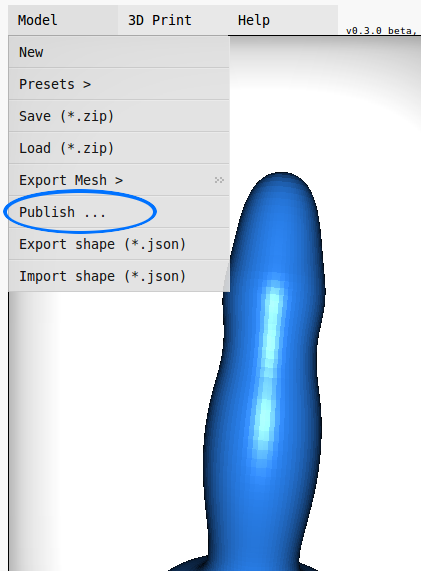
How do I publish my dildo design?
There is a menu item called Publish ... in the Model menu:
3D Printing
Where can I order a 3D print?
If you are located in Germany the guys and girls from YOUin3D.com will do the 3D print for you.
There are two options:
For the case you are located at a different spot of the universe, find the 3D printer closest to you at http://www.makexyz.com.
How do I order a 3D print?
Save your dildo model using the File → Save (*.zip) menu bar option and sent us the file in an Email
to 3D-Druck@YOUin3D.com. We will print the mold for you.
When finished the result is shipped to you. See http://3d-druck-shop.youin3d.com/.
Please note that this (the software and the silicone casting) is still somewhat experimental. Results may vary.
System Requirements
Which browsers are supported?
The App uses WebGL and THREE.js.
There is currently support for following browsers:
- Chrome/Chromium
- Opera
- Android Mobile Browser
- Blackberry Mobile Browser
Partial WebGL support exists for these (worked in our tests too, after some configuration):
- Opera
- Safari
- Internext Explorer
Note that you need a properly configured system and the latest browser version. Often the correct graphics card drivers are required, too.
If you have a supporting browser and WebGL does not work, you should check for hardware driver updates. Some browsers have WebGL deactivated by default, so
you might have to activate it first in the advanced settings.
Privacy & Security
Is any of my private data shared?
No / Only on your demand.
The whole generator runs in Javascript and is nothing more than a browser app. No server scripts are included.
Even the custom background images are loaded using the File#FileReader API which resides inside your browser. No data is sent to any server nor shared with any network as long as you don't decide to publish your design.
You explicitly have to agree before any of your data will be stored.
Note that since version 0.2.37 there is an autosave function which temporarily stores your design in a
cookie on your machine (if you have cookies allowed). For the case your browser crashes or you accidently
close the window your design will be auto-loaded on the next time you run the app and hopefully your
work won't be lost.
Try it out just by running the app from your local file system (no web server required).
Note: Since the version 0.2.27 there is a code snippet example explaining how to
to store dildo design on a server (in a database). This is just an example
and not active. The site dildo-generator.com does _not_ store any of your designed
data.
Besides, feel free to share your created models or screen shots with the web community.
What happens when I Publish my design?
Since version 0.2.38 there exists a Publish functionality in the Model
menu.
If you want to share your dildo design with the web community you might want it to be published.
Publishing in this case means your design, a screenshot of it, your name/alias/pseudonym and optionally
your email address will be stored on the official website and added to the public
gallery.
Please note that by default only the official website is enabled to do this. If you run
this dildo-generator app on your local host or your own web space you first have to configure the
publishing settings. See this FAQ section for details.
What about Social Media security and tracking?
Since version 0.3.4 the gallery offers social media integration for Facebook, Google+ and
Twitter. Visitor tracking has always been an issue with widgets from external services.
Due to this issue the gallery uses a Two-Click plugin, which loads the real
social media widgets only on demand (by clicking onto one of the buttons):

This makes your visit untrackable unless you wish to share your encounter.
Technical
How do I configure presets?
Since version 0.2.32 there is a new file called presets.js which defines an
_DILDO_PRESETS object. The object's members identify the preset sub menus
for the menu bar. Each member must have this structure:
{ label:       "Sub menu name",
  elements:    [ <preset>, ... ]
}
where each <preset> item in the elements array must look like this:
{ name:        "Preset name",
  label:       "Menu item name",
  bezier_json: <bezier_string>,
  bend_angle:  <integer in 0..180>
}
If you wonder where to get the bezier string data from, just select the Display Bezier String from the
Help menu.
The menu bar structure will automatically populated from your settings.
How to I set up the publishing settings on my local host?
If you want to run the app on your local host or on your own website and you want to allow users
to publish their designs you first have to set up the publishing configuration.
First of all you need to enable the publish function in general. Go to the config.js
file and set
_DILDO_CONFIG.HIDE_PUBLISH_MESH_MENU = false;
You also might want to change the publishing URL to the value of your choice:
_DILDO_CONFIG.PUBLISHING_URL = "store_custom_dildo.php";
Note that the URL may be absolute or relative. Whatever you require.
These two steps will make the Model→Publish menu appear and when clicked the publishing
dialog to pop up (to the user). After the user entered the required/optional data and pressed
the 'Publish!' button, the configured URL will be called and the form data sent
to the server script via the HTTP POST request method.
Note that the screenshot data is passed as an application/x-www-form-urlencoded compatible base64 string, which means
that '/' is replaced by '_', and '+' is replaced by '-'.
If you are not sure what to do just take a look and the store_custom_dildo.php file.
Of course you may want to use any other server script language of your choice here (for those who
dislike PHP).
Don't forget to set up a database service. The table_structure.sql file might guide
you for the case you don't know how to start, assumed that you want to use a relational database system.
Other
Can I scan my body parts and load them into the dildo generator?
No.
There are solutions for body part scanning but they don't create bezier paths.
Take a look at http://motherboard.vice.com/blog/scanning-the-future-of-3d-printed-sex-toys-nsfw or ask your search engine for kinect scan.
dildo-generator.com, July 2014
For the case you are located at a different spot of the universe, find the 3D printer closest to you at http://www.makexyz.com.
File → Save (*.zip) menu bar option and sent us the file in an Email
to 3D-Druck@YOUin3D.com. We will print the mold for you.When finished the result is shipped to you. See http://3d-druck-shop.youin3d.com/.
Please note that this (the software and the silicone casting) is still somewhat experimental. Results may vary.
Which browsers are supported?
The App uses WebGL and THREE.js.
There is currently support for following browsers:
If you have a supporting browser and WebGL does not work, you should check for hardware driver updates. Some browsers have WebGL deactivated by default, so you might have to activate it first in the advanced settings.
There is currently support for following browsers:
- Chrome/Chromium
- Opera
- Android Mobile Browser
- Blackberry Mobile Browser
- Opera
- Safari
- Internext Explorer
If you have a supporting browser and WebGL does not work, you should check for hardware driver updates. Some browsers have WebGL deactivated by default, so you might have to activate it first in the advanced settings.
Privacy & Security
Is any of my private data shared?
No / Only on your demand.
The whole generator runs in Javascript and is nothing more than a browser app. No server scripts are included.
Even the custom background images are loaded using the File#FileReader API which resides inside your browser. No data is sent to any server nor shared with any network as long as you don't decide to publish your design.
You explicitly have to agree before any of your data will be stored.
Note that since version 0.2.37 there is an autosave function which temporarily stores your design in a
cookie on your machine (if you have cookies allowed). For the case your browser crashes or you accidently
close the window your design will be auto-loaded on the next time you run the app and hopefully your
work won't be lost.
Try it out just by running the app from your local file system (no web server required).
Note: Since the version 0.2.27 there is a code snippet example explaining how to
to store dildo design on a server (in a database). This is just an example
and not active. The site dildo-generator.com does _not_ store any of your designed
data.
Besides, feel free to share your created models or screen shots with the web community.
What happens when I Publish my design?
Since version 0.2.38 there exists a Publish functionality in the Model
menu.
If you want to share your dildo design with the web community you might want it to be published.
Publishing in this case means your design, a screenshot of it, your name/alias/pseudonym and optionally
your email address will be stored on the official website and added to the public
gallery.
Please note that by default only the official website is enabled to do this. If you run
this dildo-generator app on your local host or your own web space you first have to configure the
publishing settings. See this FAQ section for details.
What about Social Media security and tracking?
Since version 0.3.4 the gallery offers social media integration for Facebook, Google+ and
Twitter. Visitor tracking has always been an issue with widgets from external services.
Due to this issue the gallery uses a Two-Click plugin, which loads the real
social media widgets only on demand (by clicking onto one of the buttons):
This makes your visit untrackable unless you wish to share your encounter.
Technical
How do I configure presets?
Since version 0.2.32 there is a new file called presets.js which defines an
_DILDO_PRESETS object. The object's members identify the preset sub menus
for the menu bar. Each member must have this structure:
{ label: "Sub menu name",
elements: [ <preset>, ... ]
}
where each <preset> item in the elements array must look like this:
{ name: "Preset name",
label: "Menu item name",
bezier_json: <bezier_string>,
bend_angle: <integer in 0..180>
}
If you wonder where to get the bezier string data from, just select the Display Bezier String from the
Help menu.
The menu bar structure will automatically populated from your settings.
How to I set up the publishing settings on my local host?
If you want to run the app on your local host or on your own website and you want to allow users
to publish their designs you first have to set up the publishing configuration.
First of all you need to enable the publish function in general. Go to the config.js
file and set
_DILDO_CONFIG.HIDE_PUBLISH_MESH_MENU = false;
You also might want to change the publishing URL to the value of your choice:
_DILDO_CONFIG.PUBLISHING_URL = "store_custom_dildo.php";
Note that the URL may be absolute or relative. Whatever you require.
These two steps will make the Model→Publish menu appear and when clicked the publishing
dialog to pop up (to the user). After the user entered the required/optional data and pressed
the 'Publish!' button, the configured URL will be called and the form data sent
to the server script via the HTTP POST request method.
Note that the screenshot data is passed as an application/x-www-form-urlencoded compatible base64 string, which means
that '/' is replaced by '_', and '+' is replaced by '-'.
If you are not sure what to do just take a look and the store_custom_dildo.php file.
Of course you may want to use any other server script language of your choice here (for those who
dislike PHP).
Don't forget to set up a database service. The table_structure.sql file might guide
you for the case you don't know how to start, assumed that you want to use a relational database system.
Other
Can I scan my body parts and load them into the dildo generator?
No.
There are solutions for body part scanning but they don't create bezier paths.
Take a look at http://motherboard.vice.com/blog/scanning-the-future-of-3d-printed-sex-toys-nsfw or ask your search engine for kinect scan.
dildo-generator.com, July 2014
The whole generator runs in Javascript and is nothing more than a browser app. No server scripts are included.
Even the custom background images are loaded using the File#FileReader API which resides inside your browser. No data is sent to any server nor shared with any network as long as you don't decide to publish your design. You explicitly have to agree before any of your data will be stored.
Note that since version 0.2.37 there is an autosave function which temporarily stores your design in a cookie on your machine (if you have cookies allowed). For the case your browser crashes or you accidently close the window your design will be auto-loaded on the next time you run the app and hopefully your work won't be lost.
Try it out just by running the app from your local file system (no web server required).
Note: Since the version 0.2.27 there is a code snippet example explaining how to to store dildo design on a server (in a database). This is just an example and not active. The site dildo-generator.com does _not_ store any of your designed data.
Besides, feel free to share your created models or screen shots with the web community.
Publish functionality in the Model
menu.If you want to share your dildo design with the web community you might want it to be published. Publishing in this case means your design, a screenshot of it, your name/alias/pseudonym and optionally your email address will be stored on the official website and added to the public gallery.
Please note that by default only the official website is enabled to do this. If you run this dildo-generator app on your local host or your own web space you first have to configure the publishing settings. See this FAQ section for details.
Due to this issue the gallery uses a
Two-Click plugin, which loads the real
social media widgets only on demand (by clicking onto one of the buttons):This makes your visit untrackable unless you wish to share your encounter.
How do I configure presets?
Since version 0.2.32 there is a new file called
The menu bar structure will automatically populated from your settings.
presets.js which defines an
_DILDO_PRESETS object. The object's members identify the preset sub menus
for the menu bar. Each member must have this structure:
{ label: "Sub menu name",
elements: [ <preset>, ... ]
}
where each <preset> item in the elements array must look like this:
{ name: "Preset name",
label: "Menu item name",
bezier_json: <bezier_string>,
bend_angle: <integer in 0..180>
}
If you wonder where to get the bezier string data from, just select the Display Bezier String from the
Help menu.The menu bar structure will automatically populated from your settings.
How to I set up the publishing settings on my local host?
If you want to run the app on your local host or on your own website and you want to allow users
to publish their designs you first have to set up the publishing configuration.
First of all you need to enable the publish function in general. Go to the
You also might want to change the publishing URL to the value of your choice:
Note that the URL may be absolute or relative. Whatever you require.
These two steps will make the Model→Publish menu appear and when clicked the publishing dialog to pop up (to the user). After the user entered the required/optional data and pressed the
Note that the screenshot data is passed as an application/x-www-form-urlencoded compatible base64 string, which means that '/' is replaced by '_', and '+' is replaced by '-'.
If you are not sure what to do just take a look and the
Don't forget to set up a database service. The
First of all you need to enable the publish function in general. Go to the
config.js
file and set_DILDO_CONFIG.HIDE_PUBLISH_MESH_MENU = false;
You also might want to change the publishing URL to the value of your choice:
_DILDO_CONFIG.PUBLISHING_URL = "store_custom_dildo.php";
Note that the URL may be absolute or relative. Whatever you require.
These two steps will make the Model→Publish menu appear and when clicked the publishing dialog to pop up (to the user). After the user entered the required/optional data and pressed the
'Publish!' button, the configured URL will be called and the form data sent
to the server script via the HTTP POST request method.Note that the screenshot data is passed as an application/x-www-form-urlencoded compatible base64 string, which means that '/' is replaced by '_', and '+' is replaced by '-'.
If you are not sure what to do just take a look and the
store_custom_dildo.php file.
Of course you may want to use any other server script language of your choice here (for those who
dislike PHP).Don't forget to set up a database service. The
table_structure.sql file might guide
you for the case you don't know how to start, assumed that you want to use a relational database system.
Other
Can I scan my body parts and load them into the dildo generator?
No.
There are solutions for body part scanning but they don't create bezier paths.
Take a look at http://motherboard.vice.com/blog/scanning-the-future-of-3d-printed-sex-toys-nsfw or ask your search engine for kinect scan.
dildo-generator.com, July 2014
There are solutions for body part scanning but they don't create bezier paths.
Take a look at http://motherboard.vice.com/blog/scanning-the-future-of-3d-printed-sex-toys-nsfw or ask your search engine for
kinect scan.