
                                                                            Author......Ikaros Kappler
                                                                            Date............2016-01-29
                                                                            Version................1.0
A Basic THREE.js Scene Setup
Why this?
Some months ago a friend who had to write a 3D web application for a
customer asked me for a basic THREE.js scene setup.
For your information: THREE.js is a fully featured 3D visualization and modelling library completely written in Javascript. It uses the new WebGL capabilities of modern web browsers.
A scene usually consists of at least
Here's a screenshot what it looks like: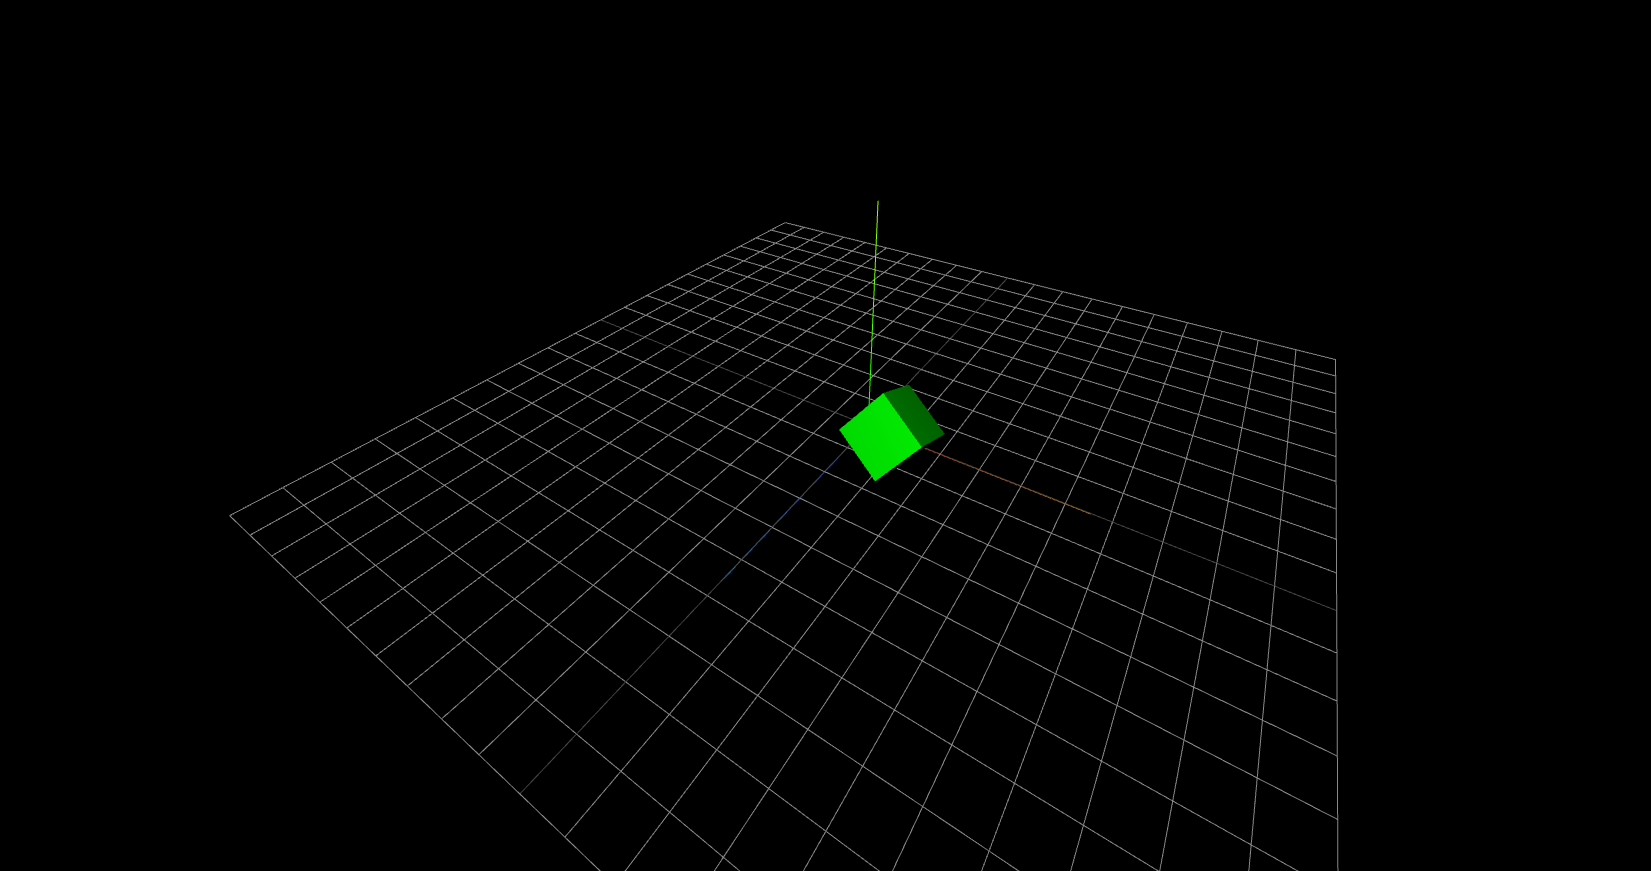
Here's the working Demo.
(Please note that you need to have WebGL enabled in you browser; by default some browsers still have this setting deactivated)
For your information: THREE.js is a fully featured 3D visualization and modelling library completely written in Javascript. It uses the new WebGL capabilities of modern web browsers.
A scene usually consists of at least
- The scene itself.
- A renderer.
- A light emitter (sun, bulp, diffuse, ...).
- A camera.
- Some objects (otherwise you cannot see anything except a blank screen).
- A basic mouse controller for rotating (LMB), padding (RMB) and zooming (mousewheel).
Here's a screenshot what it looks like:
Here's the working Demo.
(Please note that you need to have WebGL enabled in you browser; by default some browsers still have this setting deactivated)
The Code
My code uses three Javascript files, two of them coming from the THREE.js package (download can be
found on their website), and one self written file specifying the scene settings:
And this is my Javascript code (from the main.js file):
I placed a lot of comments in the code, so I hope the Javascript code is self explaining :)
- three.r72.min.js (the minified library code, revision 72)
- OrbitControls.js (a helper class for the mouse controls; from the examples)
- main.js (my code)
      <html>
      <head>
      <title>My basic THREE.js scene setup</title>
      <style>
      canvas { width: 100%; height: 100% }
      </style>
      </head>

      <body>
      <script language="Javascript" type="text/javascript" src="lib/three.r72.min.js"></script>
      <script language="Javascript" type="text/javascript" src="lib/threejs.examples/js/controls/OrbitControls.js"></script>
      <script src="main.js"></script>
      </body>
      </html>
And this is my Javascript code (from the main.js file):
      /**
       * Example for a basic THREE.js scene setup.
       *
       * @author  Ikaros Kappler
       * @date    2015-11-09
       * @version 1.0.0
       **/

      // Create new scene
      this.scene = new THREE.Scene();

      // Create a camera to look through
      this.camera = new THREE.PerspectiveCamera(75, window.innerWidth/window.innerHeight, 0.1, 1000);

      // Initialize a new THREE renderer (you are also allowed
      // to pass an existing canvas for rendering).
      this.renderer = new THREE.WebGLRenderer( { antialias : true } );
      this.renderer.setSize( window.innerWidth,
      window.innerHeight
      );

      // ... and append it to the DOM
      document.body.appendChild(renderer.domElement);


      // Create a geometry conaining the logical 3D information (here: a cube)
      var geometry = new THREE.CubeGeometry(12,12,12);

      // Pick a material, something like MeshBasicMaterial, PhongMaterial,
      var material = new THREE.MeshPhongMaterial({color: 0x00ff00});

      // Create the cube from the geometry and the material ...
      var cube = new THREE.Mesh(geometry, material);
      cube.position.set( 12, 12, 12 );

      // ... and add it to your scene.
      this.scene.add(cube);


      // Add some light
      this.pointLight = new THREE.PointLight(0xFFFFFF);
      //this.pointLight = new THREE.AmbientLight(0xFFFFFF);

      // set its position
      this.pointLight.position.x = 10;
      this.pointLight.position.y = 50;
      this.pointLight.position.z = 130;

      // add to the scene
      this.scene.add( this.pointLight );


      // Add grid helper
      var gridHelper = new THREE.GridHelper( 90, 9 );
      gridHelper.colorGrid = 0xE8E8E8;
      this.scene.add( gridHelper );


      // Add an axis helper
      var ah                  = new THREE.AxisHelper(50);
      ah.position.y -= 0.1;  // The axis helper should not intefere with the grid helper
      this.scene.add( ah );


      // Set the camera position
      this.camera.position.set( 75, 75, 75 );
      // And look at the cube again
      this.camera.lookAt( cube.position );


      // Finally we want to be able to rotate the whole scene with the mouse:
      // add an orbit control helper.
      var _self = this;
      this.orbitControls = new THREE.OrbitControls( this.camera, this.renderer.domElement );
      // Always move the point light with the camera. Looks much better ;)
      this.orbitControls.addEventListener( 'change',
      function() { _self.pointLight.position.copy(_self.camera.position); }
      );
      this.orbitControls.enableDamping = true;
      this.orbitControls.dampingFactor = 1.0;
      this.orbitControls.enableZoom    = true;
      this.orbitControls.target.copy( cube.position );


      // This is the basic render function. It will be called perpetual, again and again,
      // depending on your machines possible frame rate.
      this._render = function () {
      // Pass the render function itself
      requestAnimationFrame(this._render);

      // Let's animate the cube: a rotation.
      cube.rotation.x += 0.05;
      cube.rotation.y += 0.04;

      this.renderer.render(this.scene, this.camera);
      };
      // Call the rendering function. This will cause and infinite recursion (we want
      // that here, because the animation shall run forever).
      this._render();
I placed a lot of comments in the code, so I hope the Javascript code is self explaining :)
Edit
The code above creates a canvas with full window fit but does not resize if the window size changes. Add this code for auto-resizing:
function onWindowResize() {
    camera.aspect = window.innerWidth / window.innerHeight;
    camera.updateProjectionMatrix();
    renderer.setSize( window.innerWidth, window.innerHeight );
}
window.addEventListener( 'resize', onWindowResize, false );
Note: The syntax highlighting was made with tohtml.com.
Enjoy the code, have a good time and help others!