                                                                            Author......Ikaros Kappler
                                                                            Date............2015-03-26
									    Modified........2015-04-13
                                                                            Version................1.0
Booting my PC remotely using a RaspberryPi
Connecting the main board of my PC
On my ASRock motherboard I found a header like this with the 'Power Switch' connector (Pin
6 and 8) which are connected to the – big surprise – power switch of
my computer case.
I just opened the wires and soldered a bypass into them, the blue/white cable in the pictures below :)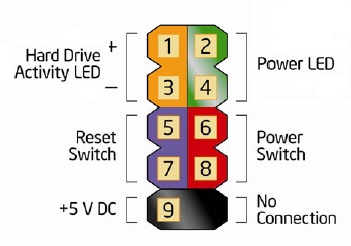
Short-circuiting the blue-white wires sends the signal to the controller and commands it to boot the computer.
I just opened the wires and soldered a bypass into them, the blue/white cable in the pictures below :)
Short-circuiting the blue-white wires sends the signal to the controller and commands it to boot the computer.
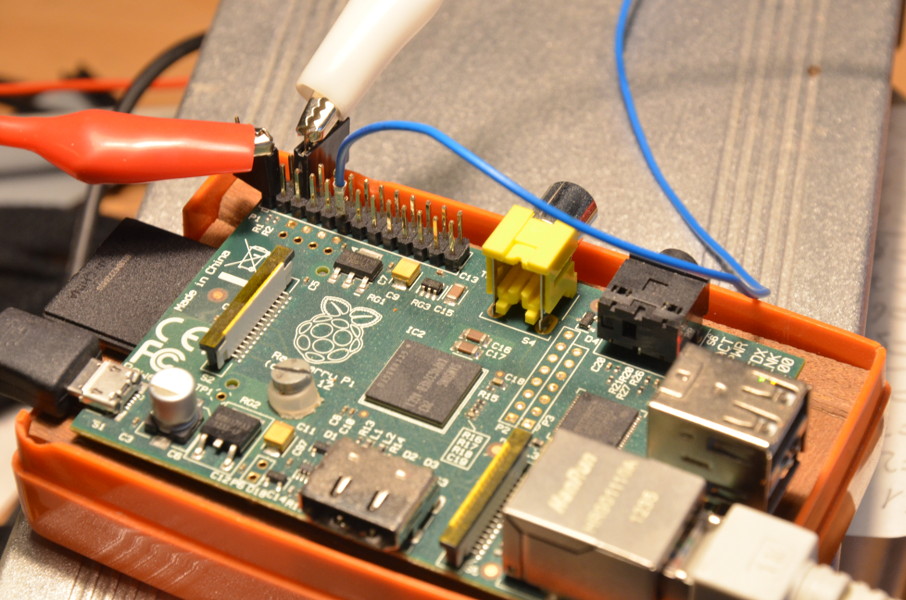
Connectors of RPi
I used GPIO Pin 11 (blue wire) to give the signal, Uc 3.3V+ (red clamp)
and GND (white clamp) for connections.
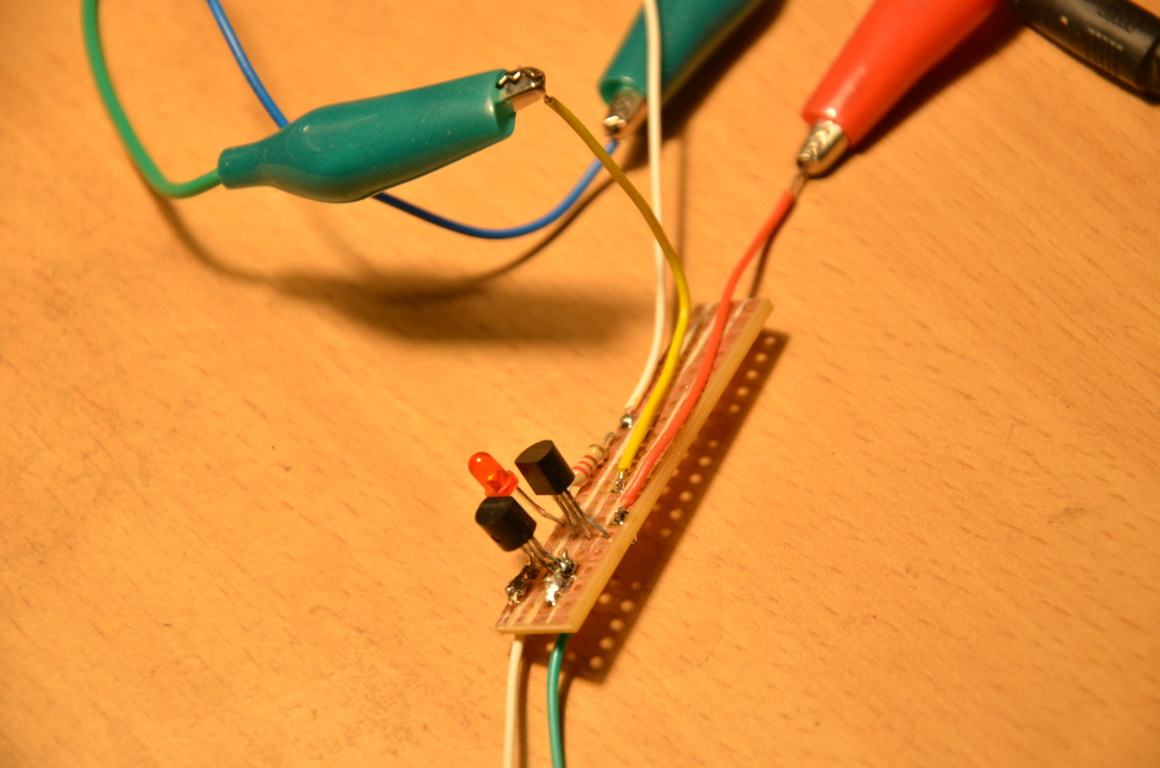
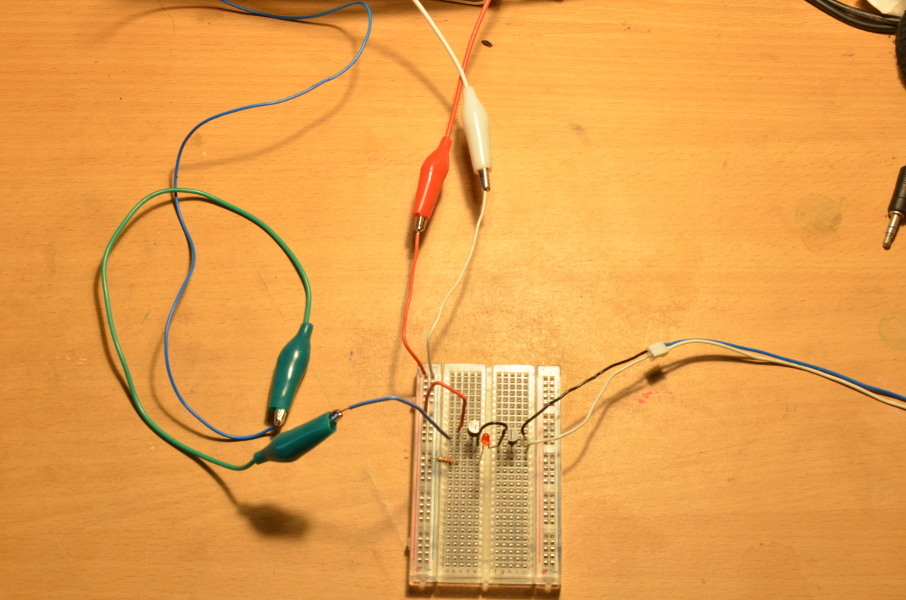
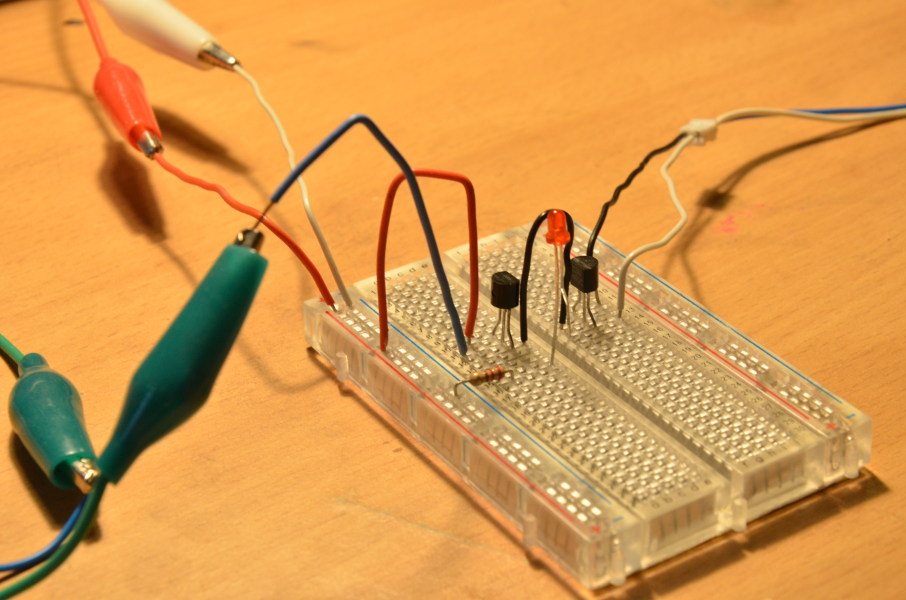
Circuit Board
For the (very simple) circuit I used two BC547-NPN transistors, a 220Ω resistor and a LED
to indicate when signal in ON.
Fritzing file: Raspi_PC_Startup.fzz
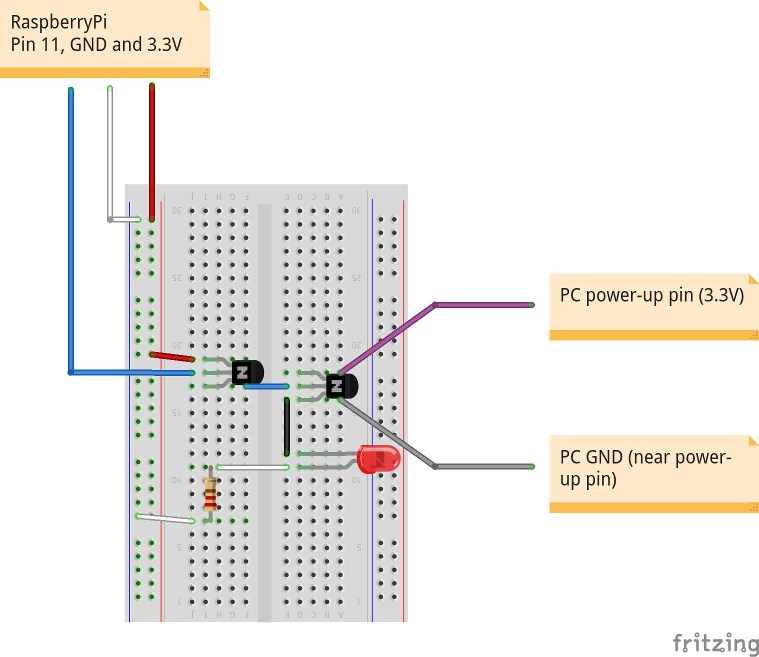
Fritzing file: Raspi_PC_Startup.fzz
The python script
Create a simple python script startup.py that sets your GPIO
pin 11 to HI for one second and then switches it back to LO:
Check if your python script runs:
#!/usr/bin/python

# enable debugging
import cgitb
cgitb.enable()

# The comma prevents 'print' to add a line break.
print "Content-Type: text/plain; charset=utf-8\r\n\r\n",

# date 2015-01-25
# A test script to set voltage=HI on your RaspberryPi (pin 11) for 1 second, then LO again.

import RPi.GPIO as GPIO
import time

GPIO.setmode(GPIO.BOARD)

GPIO.setup( 11, GPIO.OUT );

try:
    print "Pin 11 HI"
    GPIO.output( 11, True )
    time.sleep( 1 )
    print "Pin 11 LO"
    GPIO.output( 11, False )
    time.sleep( 2 )
    GPIO.cleanup()
except KeyboardInterrupt:
    GPIO.output( 11, False )
    GPIO.cleanup()
    # print "Program exit by keyboard interrupt."
Check if your python script runs:
sudo python startup.py
Output:
  Content-Type: text/plain; charset=utf-8

  Pin 11 HI
  Pin 11 LO
Note: we will need the Conent-Type header later when calling the script via HTTP.
Manipulate the CGI configuration
Go to your /etc/apache2/sites-enabled/000-default configuration file.
Add the line
to this section, it will enable the CGI handler for python scripts:
Now add a sub directory for your CGI script because we don't want to protected the whole CGI path:
Place your startup.py file here and set the executable flag so Apache ca use it:
The python script is now placed in Apache's cgi-bin directory and can be called from your web browser (though it still throws errors). To prevent unauthorized access you should set up a password for your system's protection.
AddHandler cgi-script .cgi .pyto this section, it will enable the CGI handler for python scripts:
    [...]
        ScriptAlias /cgi-bin/ /usr/lib/cgi-bin/
        <Directory "/usr/lib/cgi-bin">

                # Added 2015-03-26 by Ika
                AddHandler cgi-script .cgi .py

                AllowOverride None
                Options +ExecCGI -MultiViews +SymLinksIfOwnerMatch
                Order allow,deny
                Allow from all
        </Directory>
Now add a sub directory for your CGI script because we don't want to protected the whole CGI path:
sudo mkdir /usr/lib/cgi-bin/startup
Place your startup.py file here and set the executable flag so Apache ca use it:
sudo chmod a+x /usr/lib/cgi-bin/startup/startup.py
The python script is now placed in Apache's cgi-bin directory and can be called from your web browser (though it still throws errors). To prevent unauthorized access you should set up a password for your system's protection.
Protecting the cgi-bin subdirectory with a password
Open your /etc/apache2/sites-enabled/000-default file again
and add this section. It will set up a basic password protection to prohibit unauthorized
access to the script. After all the script controls your hardware!
The /usr/lib/cgi-bin/startup/.htpasswd file is a plain apache/htaccess password file.
        # Added 2015-03-26 Ika (procted cgi-bin/startup/ with a password)
        <Directory "/usr/lib/cgi-bin/startup">
                AllowOverride None
                Options None
                Order allow,deny
                Allow from all

                AuthType Basic
                AuthName "Scripts"
                AuthUserFile /usr/lib/cgi-bin/startup/.htpasswd

                Require valid-user
                Satisfy All
        </Directory>
The /usr/lib/cgi-bin/startup/.htpasswd file is a plain apache/htaccess password file.
Setting up the cgi-interface
Do this on your own responsibility and only if you know what you do. We will give the www-user
the permission to execute a shell script with sudo privilegues!
As we want to access /dev/mem our www user (Apache) requires sudo permissions. So we need a wrapper to call python with sudo. Create /usr/lib/cgi-bin/startup/startup.sh:
Now edit your /etc/sudoers file (this file has to be edited with visudo):
and add these two lines to the end of the file:
As we want to access /dev/mem our www user (Apache) requires sudo permissions. So we need a wrapper to call python with sudo. Create /usr/lib/cgi-bin/startup/startup.sh:
#!/bin/sh

sudo python startup.py
Now we need to give the user 'www-data' the privilegue to execute this script with sudo
permissions without asking for a password. Change to root (the pi user is allowed to do so):
sudo -i
Now edit your /etc/sudoers file (this file has to be edited with visudo):
visudo
and add these two lines to the end of the file:
www-data ALL=(ALL) NOPASSWD: /usr/lib/cgi-bin/startup/startup.sh

www-data ALL=(ALL) NOPASSWD: /usr/bin/python
[...]
# User privilege specification
root    ALL=(ALL:ALL) ALL

# Allow members of group sudo to execute any command
%sudo   ALL=(ALL:ALL) ALL

# See sudoers(5) for more information on "#include" directives:

#includedir /etc/sudoers.d
pi ALL=(ALL) NOPASSWD: ALL

www-data ALL=(ALL) NOPASSWD: /usr/lib/cgi-bin/startup/startup.sh
www-data ALL=(ALL) NOPASSWD: /usr/bin/python
Now Apache runs the startup.sh script with the permission to fork
sudo processes (python), just by passing its request URL! That's why we have set up the password.
Test your configuration
Open your browser and test if your CGI script is available:
http://127.0.0.1/cgi-bin/startup/startup.sh
Enter the username and password. The document should show
http://127.0.0.1/cgi-bin/startup/startup.sh
Enter the username and password. The document should show
    Pin 11 HI
    Pin 11 LO
and your PC/other connected device should now (re-)boot.